• Welcome to Jetboaters.net!

    We are delighted you have found your way to the best Jet Boaters Forum on the internet! Please consider Signing Up so that you can enjoy all the features and offers on the forum. We have members with boats from all the major manufacturers including Yamaha, Seadoo, Scarab and Chaparral. We don't email you SPAM, and the site is totally non-commercial. So what's to lose? IT IS FREE!

    Membership allows you to ask questions (no matter how mundane), meet up with other jet boaters, see full images (not just thumbnails), browse the member map and qualifies you for members only discounts offered by vendors who run specials for our members only! (It also gets rid of this banner!)

    free hit counter

‘15+ head compartment / port wall, how?

BigAbe75

Jetboaters Admiral
Messages
2,488
Reaction score
1,968
Points
292
Location
Litchfield, IL
Boat Make
Yamaha
Year
2019
Boat Model
X
Boat Length
24
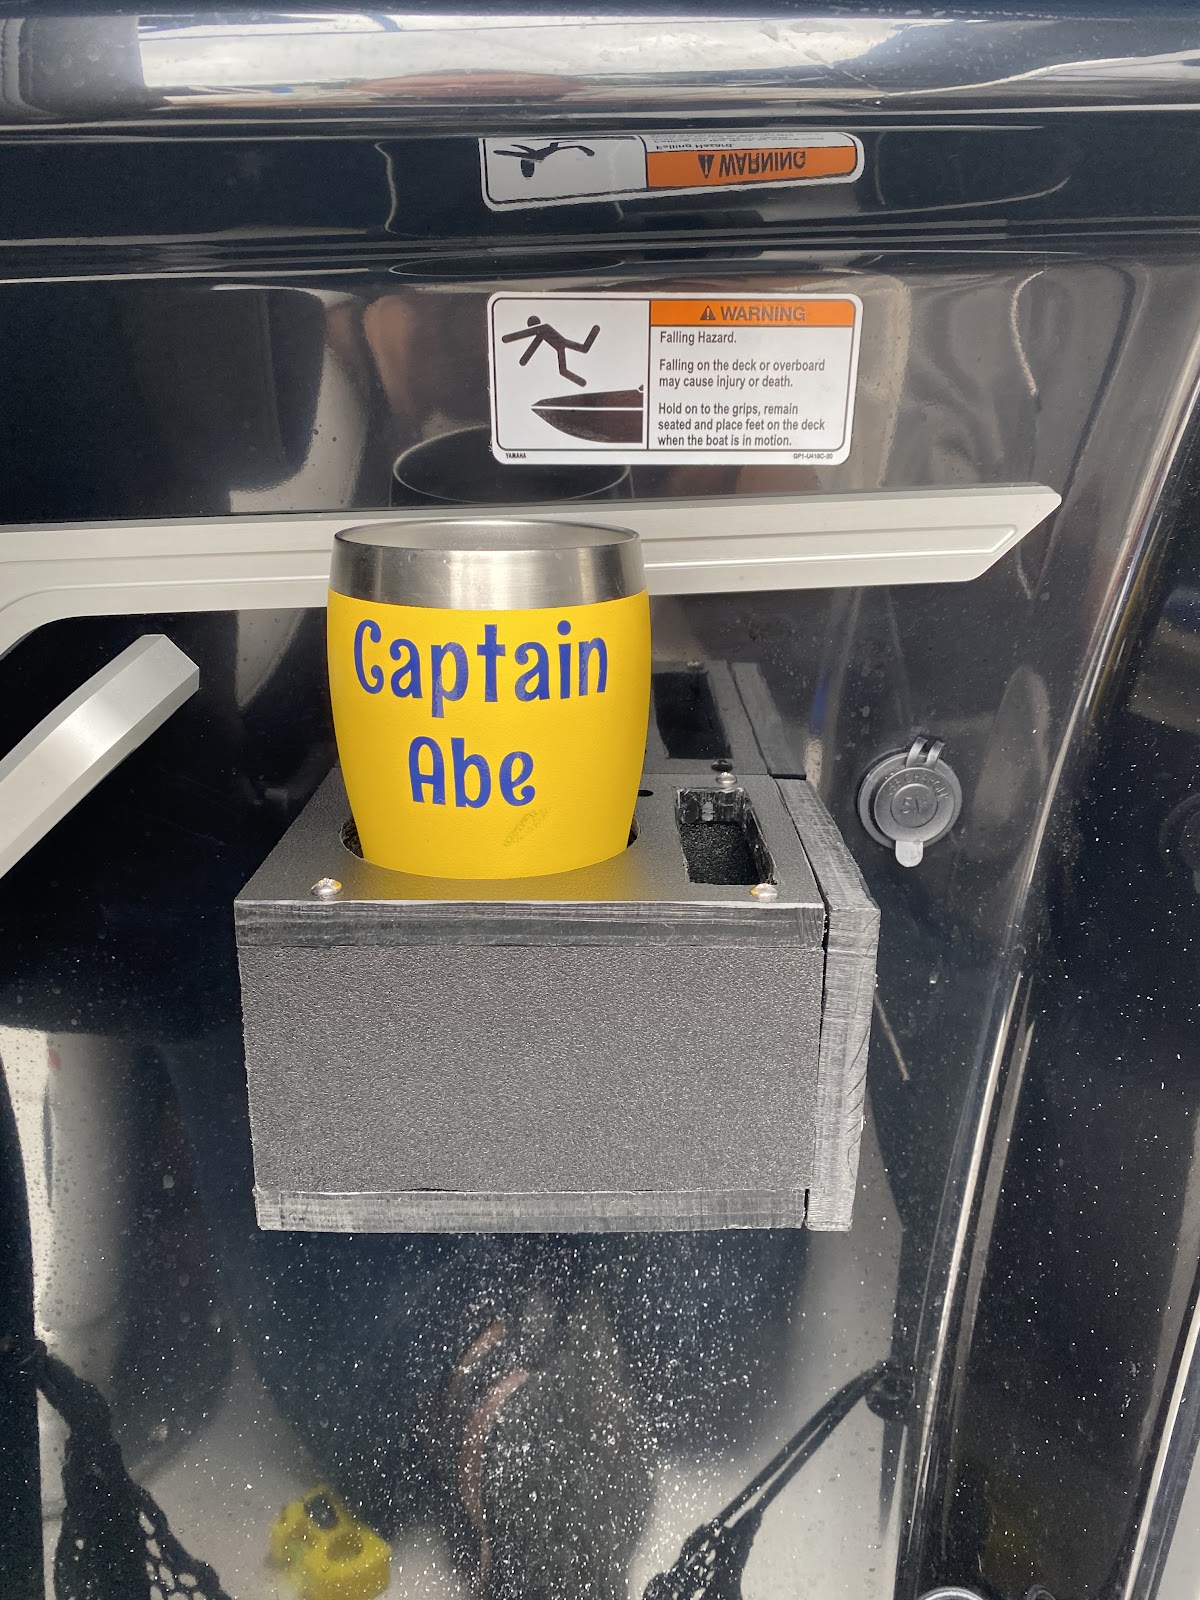
I built myself a cup holder / phone holder and plan to mount it on the port wall just in front of the grab handle and above the mesh pocket.

68B1D40C-0B78-477B-8748-597EB8893A4C.jpeg

My question is how can I access the back side of that wall to put nuts on the bolts that I want to use to mount this?

I know some have been in there to install a speaker, and @Julian installed a usb charger (I think). Does the plywood wall on the side of the head compartment come out easy? Or, can I reach up behind there from under the seat? I’m thinking it has to be through the head. @Mainah - you’ve probably been in there?

Here’s my prototype... modeled after a few I found on amazon. Just turned out to be too darn big, and mounting low enough to fit a big cup was going to hinder the use of the mesh area (beach bag and/or snack bag for us). So, I went with the smaller version and I think I’ll be happier.
6C474CFC-C434-48A0-B279-933024556CE2.jpeg

I haven’t actually test fit the new one in place, yet. But I’m optimistic that it’ll work.

Reasoning: wife usually rotates the seat to face in to the cabin when we float/swim. From this position, the cup holders are unreachable from her chair. Also, she has no good spot for her phone. This will keep it more out of the sun.
 
Looks great! Walking gently here...Being that it is a cold drink holder...I question the color black as the best color for keeping drinks cold on a hot day. Even with a koozie on the port shelf under a bimini. Now that you have your prototype design, making it from a piece of 1/2" white starboard may suit the purpose of a cold drink/phone holder better than CDX in a marine environment. But, I do not know the colors of your boat. Just my $.02, not trying to be a dink, but that animal already left the barn here. ;) Good luck getting it mounted.
 
I was able to pull back the divider wall enough to get video behind there and to put the rear nut on the USB charger I installed. You could install helm speakers while you are at it, and use the speaker hold to access it. (nothing like adding more to the job!)
 
Well, I guess I should have posted the prototype a bit sooner. Lol

The prototype was leftover plywood and a 1x4 from the scrap bin and drywall screws. The finished version is black starboard and stainless screws. Lol

That side wall is black, so I thought the black starboard would be better and not stick out as much. Didn’t give any thought to it getting hot. Hmm... I’ll stick with this for now and see how it goes. Maybe v2 will be white.

I’m certainly no carpenter, but dang starboard is the hardest material I’ve ever worked with. It’s awesome, and can be trimmed with a razor knife... but geez it’s slick. Almost impossible to hold in one place to measure and join.
 
I was able to pull back the divider wall enough to get video behind there and to put the rear nut on the USB charger I installed. You could install helm speakers while you are at it, and use the speaker hold to access it. (nothing like adding more to the job!)
That might be outside the current budget range. Although, I did see @jacoviii is selling matching wetsounds speakers to everything else in my boat. ?
 
That might be outside the current budget range. Although, I did see @jacoviii is selling matching wetsounds speakers to everything else in my boat. ?
See...the planets are lining up to grant you good stereo / cup holder karma! LOL (just not so good for your budget)
 
Well, I guess I should have posted the prototype a bit sooner. Lol

The prototype was leftover plywood and a 1x4 from the scrap bin and drywall screws. The finished version is black starboard and stainless screws. Lol

That side wall is black, so I thought the black starboard would be better and not stick out as much. Didn’t give any thought to it getting hot. Hmm... I’ll stick with this for now and see how it goes. Maybe v2 will be white.

I’m certainly no carpenter, but dang starboard is the hardest material I’ve ever worked with. It’s awesome, and can be trimmed with a razor knife... but geez it’s slick. Almost impossible to hold in one place to measure and join.


I wonder if you can drill pocket holes in it?
 
I seem to recall there just a couple screws holding that panel on.

For the record, I like @Julian's plan. Cut more holes, install more speakers. ??
 
Do you remember how that wall in the head comes loose? I can’t remember how it’s attached and I’m too big to get in and out a bunch. Once I’m in, somebody else has to run for tools and hand me stuff. Probably would end up making wife do that part. :)
There are some screw caps you pop off and unscrew the screws behind it. I only took the top ones off, as at the bottom it was more complicated with the shelf in the way, so I didn't mess with them. I was able to pull it gently back enough to get behind there to deal with the nuts.
 
I seem to recall there just a couple screws holding that panel on.

For the record, I like @Julian's plan. Cut more holes, install more speakers. ??
This forum is full of bad influences!!
 
There are some screw caps you pop off and unscrew the screws behind it. I only took the top ones off, as at the bottom it was more complicated with the shelf in the way, so I didn't mess with them. I was able to pull it gently back enough to get behind there to deal with the nuts.
I think I did end up unscrewing the shelf as well too fully remove the panel.
 
This forum is full of bad influences!!

Might want to start looking for a 4 channel amp while you are at it. That way you can power the two new speakers, and take the Sound bar out of series while you are at it (assuming your model year still has it wired in series).

If you give a moose a muffin....
 
Well, I guess I should have posted the prototype a bit sooner. Lol

The prototype was leftover plywood and a 1x4 from the scrap bin and drywall screws. The finished version is black starboard and stainless screws. Lol

That side wall is black, so I thought the black starboard would be better and not stick out as much. Didn’t give any thought to it getting hot. Hmm... I’ll stick with this for now and see how it goes. Maybe v2 will be white.

I’m certainly no carpenter, but dang starboard is the hardest material I’ve ever worked with. It’s awesome, and can be trimmed with a razor knife... but geez it’s slick. Almost impossible to hold in one place to measure and join.
My appology. I saw the plywood and the black starboard thinking it was black paint. Never mind what I said.:banghead:
 
My appology. I saw the plywood and the black starboard thinking it was black paint. Never mind what I said.:banghead:
:) after I read it, I kind of figured it looked like that. I wanted to use the scraps up before digging in to the expensive stuff and then wishing I could make changes. All feedback welcome!!
 
There is room on the stock WS HTX6 amp for 2 more speakers. The 4 main speakers are run Left Bow & rear cockpit parallel 2 ohm load/ Right Bow & rear cockpit parallel 2 ohm load on CH1 & CH2. The stern is CH3 & CH4 @ 4 ohm. The sound bar and tower speakers are on the HTX4.
 
The bolts
 

Attachments

  • 20200521_154757.jpg
    20200521_154757.jpg
    723 KB · Views: 12
  • 20200521_154838.jpg
    20200521_154838.jpg
    800.5 KB · Views: 11
  • 20200521_154831.jpg
    20200521_154831.jpg
    773.9 KB · Views: 11
Just to finish out my own thread - we got it figured out.

Pop off 3 plastic covers, remove 3 screws and the plywood piece comes right off.

CvlS3GANPlKRJ-Y3pYXEa2A6q0-cAAVjU9uKvjA4qjqecyg2T8M8oQqKkBsakqVkg2tYYN7SdkxvDe80wKJ3ohFcsYwEtpqJQZXDJ8yZpWs9-ON5eFU4LrQQAsF1f4D5UiFXBIU


pQnvo8MrMZHIOe6Mfn_3WIAgAi0IJwU4xpT_4MA5p_Xe_KJCuUSIoBqEAcrox87kWdTvNDjUTxd7ZtF8l3If3ytnnEMcl6vgnpV6nobr9sU2WrXhJawn_OXGHdUJFwIZTJTCcdQ


After the pic, I also routed a phone charging cable through a couple holes I added and to the usb port. You can just see the hole on top behind the cup. And the other hole is at the bottom corner closest to the wall and usb port. I used whatever drill bit is just larger than 1/4" (I think) and was able to feed the smaller end of a iphone cable through it. Used a small zip tie to wrap up the cable a bit and leave the charging end dangling out the top. Users would put the phone in with bottom up, and plug in at the top to charge.
 
Back
Top