• Welcome to Jetboaters.net!

    We are delighted you have found your way to the best Jet Boaters Forum on the internet! Please consider Signing Up so that you can enjoy all the features and offers on the forum. We have members with boats from all the major manufacturers including Yamaha, Seadoo, Scarab and Chaparral. We don't email you SPAM, and the site is totally non-commercial. So what's to lose? IT IS FREE!

    Membership allows you to ask questions (no matter how mundane), meet up with other jet boaters, see full images (not just thumbnails), browse the member map and qualifies you for members only discounts offered by vendors who run specials for our members only! (It also gets rid of this banner!)

    free hit counter
  • Guest, we are pleased to announce that Hydrophase Ridesteady is offering an extra $100 off for JETBOATERS.NET members on any Ridesteady for Yamaha Speed Control system purchased through March 7th, 2025. Ridesteady is a speed control system (“cruise control”) that uses GPS satellites or engine RPM to keep your boat at the set speed you choose. On twin engine boats, it will also automatically synchronize your engines.

    Click Here for more information>Ride Steady group buy for JetBoaters.net members only

    You can dismiss this Notice by clicking the "X" in the upper right>>>>>

212X Second Bilge Pump

slickstick

Jet Boat Addict
Messages
204
Reaction score
86
Points
87
Boat Make
Yamaha
Year
2019
Boat Model
212X
Boat Length
21
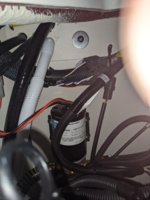
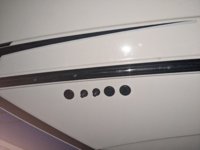
First part of the job is done. Thru hull installed, pump mounted, and hose ran. I think I need to re-run the hose so it doesn't dip down into the engine bay where water will get stuck in it. I also noticed in the instructions it says the pump outlet should face the rear of the boat. I am guessing this is just because in their picture they show the thru hull on the transom. It seems to make more sense for the hose connection to face the direction the water needs pumped, right? In my case this is towards the front of the boat.Snapchat-1150424102.jpg
PXL_20210227_013728470.jpg
PXL_20210227_013745899.jpg
PXL_20210227_013537259.jpg
PXL_20210226_231754711.jpg
PXL_20210227_012430973.jpg
 
Still need to run the electrical and mount the switch as well.
 
Looks good. I mounted mine facing forward as well. Also, for what it’s worth, I didn’t bother with a switch, just wired the two wires directly to the house battery with a fuse. Left the switch wire disconnected.
 
First part of the job is done. Thru hull installed, pump mounted, and hose ran.
@slickstick ..... nice work. Great idea to put tape around the hole before drilling in case the hole saw skips. BTW, I'm sure everyone knows the "trick" to a clean hole cut is to run the drill/saw in reverse first to stop chipping of the gel coat/ paint/ fiberglass. :cool:
 
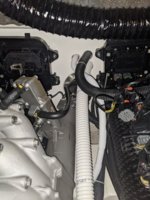
Updated the hose routing to try and avoid a big dip into the engine bay. I wanted to keep the hose away from the manifold as much as possible but hopefully this will workout and she won't melt on me. In hindsight I would have bought a better hose. Didn't realize how frail this one was until it showed up.PXL_20210301_231659877.jpg
PXL_20210301_231728833.jpg
 
Is the big hose down the middle of the engine bay just a drain from the deck into the bilge? I would have thought it dumped in right above where I have the pump but it connects somewhere in the bilge.PXL_20210301_233603078.jpg
 
Is the big hose down the middle of the engine bay just a drain from the deck into the bilge? I would have thought it dumped in right above where I have the pump but it connects somewhere in the bilge.
If you follow it, the hose goes to a fitting at the transom where it drains overboard. The fitting has a flap valve to keep water out but still drain. This is the "self bailing cockpit" feature.
 
Well I finished up the job today. She works! It takes a shocking amount of water before the pump kicks in, though. Had to disconnect the OEM bilge pump to test it and flood the engine bay before she started doing her thing. I didn't want to at first but may be better off just sealing the pump to the floor of the bilge that extra couple of inches looks like it may make a big difference.
 
PXL_20210306_192702851.jpg
PXL_20210306_194528272.jpg

Connectors with built in solder and then liquid electrical tape.
 
PXL_20210306_233125526.jpg
Does this work for a ground or do you all run everything back to the battery distribution block?
 
PXL_20210307_001614613.jpg
Not sure what this hose behind the helm is for. Neither side was connected to anything.
 
View attachment 143631
Not sure what this hose behind the helm is for. Neither side was connected to anything.

Thanks for sharing your install. Do you mind sharing where you picked up that switch? The one I pick-up is significantly larger in size, and I haven’t settled on where I’m going to install the switch yet (currently I have it by the battery switch, but that’s just temporary).

As for the house, I have a different boat, but that looks like the drainage hose that connects to the bottom of either the cup holder or the small “storage tray” I have at the helm to route water towards the bilge. On my boat is seems only the helm and glove box are connected to a drainage hose, sadly the balance of the cup holders just drain into the storage compartments they are built into.

Also for the ground question, I don’t believe that works as the boat is not akin to a car where you can ground to a “frame”.
 
Also for the ground question, I don’t believe that works as the boat is not akin to a car where you can ground to a “frame”.

This is correct. A ground wire should be run back to the ground bus next to the battery. Every electrical circuit in a boat needs to have a solid connection back to the battery.
 
Newbie question. What is the necessity for adding a second bilge pump in the boat?

For me it is insurance in two areas. While I have not done mine yet, it’s at the top of the to do list. From what I have seen so far, the footprint of these pumps seems to be pretty similar between a 500gph and a 1500gph pump, so I will be going with a 1500 gph.

Firstly having the second bilge pump there in case one fails, kinda like a spare tire in a car.

The second is for the oh snap situation wherein you may find yourself in some big water with waves coming over the bow and into the boat. In this second situation the adage “overkill is under rated” comes to mind. I would think being in that situation and seeing the switches light up letting you know the bilge pumps are running, then turning off after the water in the bilge has been removed would be pretty reassuring. The other situation that comes to mind is if one were to forget to put the plug in, a DOH! moment. Having that second bilge pump would turn a possibly disastrous mistake into just an embarrassing one.
 
Thanks for sharing your install. Do you mind sharing where you picked up that switch? The one I pick-up is significantly larger in size, and I haven’t settled on where I’m going to install the switch yet (currently I have it by the battery switch, but that’s just temporary).

As for the house, I have a different boat, but that looks like the drainage hose that connects to the bottom of either the cup holder or the small “storage tray” I have at the helm to route water towards the bilge. On my boat is seems only the helm and glove box are connected to a drainage hose, sadly the balance of the cup holders just drain into the storage compartments they are built into.

Also for the ground question, I don’t believe that works as the boat is not akin to a car where you can ground to a “frame”.
Thanks... I'll try and check to see if it came loose off that tray near the helm.

Here you go on the switch: Amazon.com: Amarine Made Deluxe LED Rocker Bilge Pump Switch Panel & Circuit Breaker - Auto/Off/Man LED Lighted Control Switches for RV Truck Caravan Vehicles Off-Road Camper: Industrial & Scientific
 
This is correct. A ground wire should be run back to the ground bus next to the battery. Every electrical circuit in a boat needs to have a solid connection back to the battery.
Ugh... Just when I thought I finished the project.

I'm starting a radio install next so I'll be running more wires anyways I suppose.
 
Back
Top