ScarabMike
Jetboaters Admiral
- Messages
- 2,223
- Reaction score
- 2,061
- Points
- 302
- Location
- Green Cove Springs, FL
- Boat Make
- Yamaha
- Year
- 2022
- Boat Model
- AR
- Boat Length
- 19
Ok,
Today was the day to finally install my second battery, and multi-battery switch.
Here is what you will need.
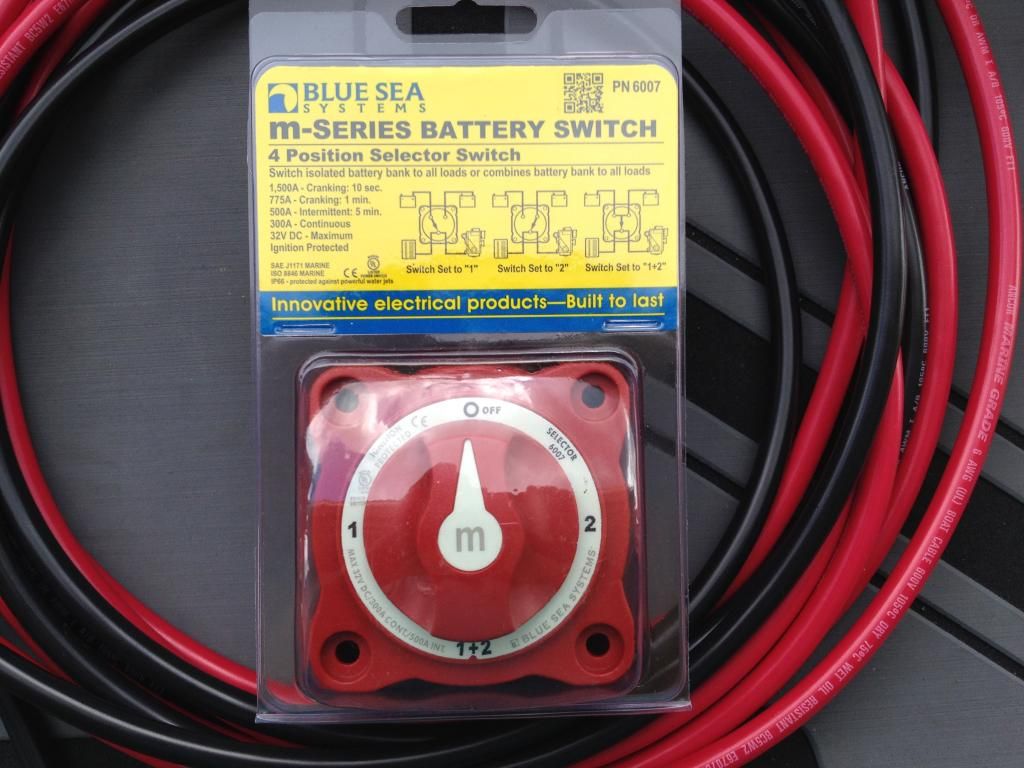
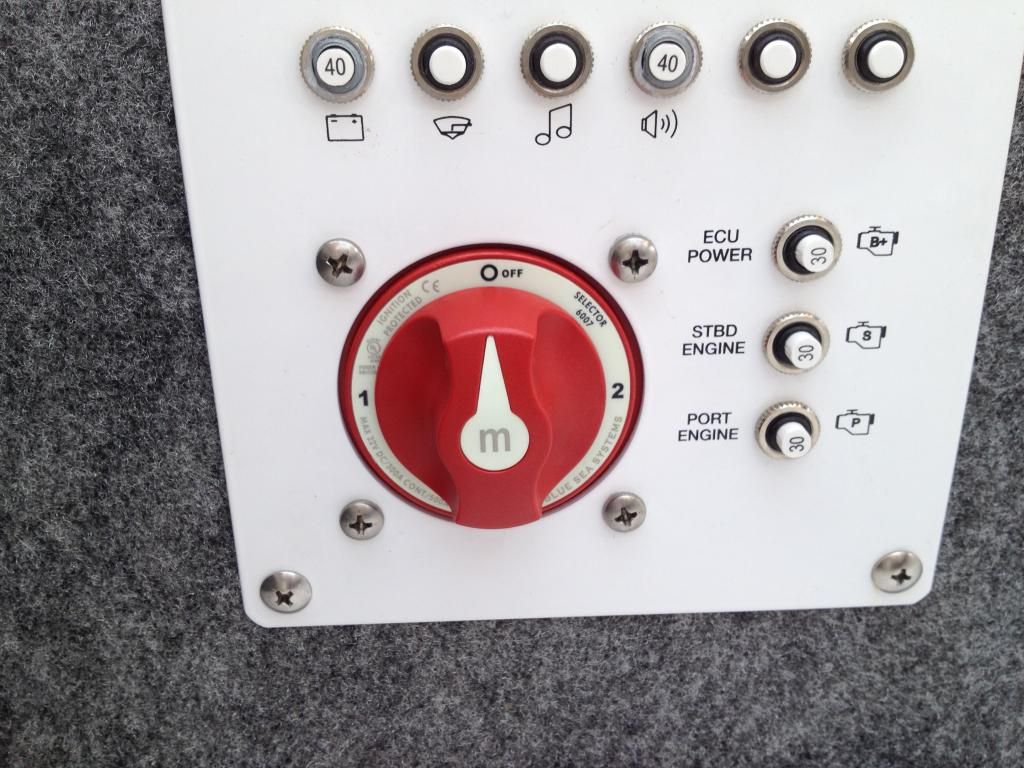
Blue Sea Systems 6007 Switch
12ft of 6 gauge red cable
12ft of 6 gauge black cable
2 sets of battery connectors (the ones with the holes)
red/black shrink wrap
2 10" bags of wire loom
Group 27 Battery
Battery tray
Stainless steel wood screws (1/2")
3M 5200 sealant
Wire ties/zip ties
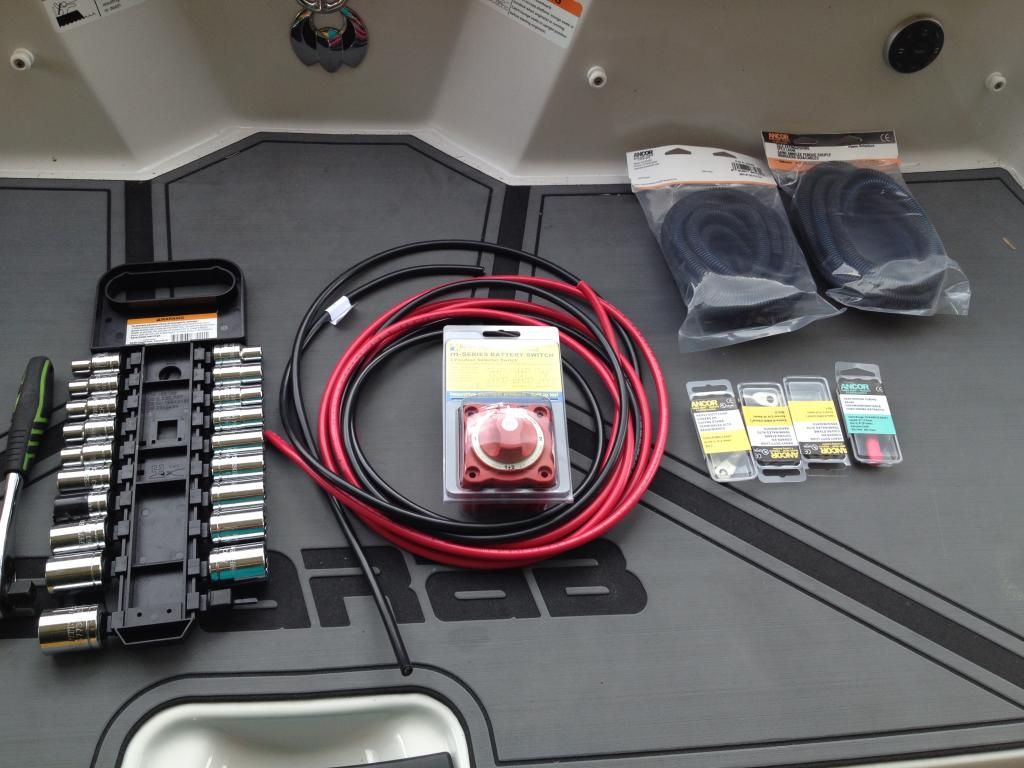
Here we go!
Today was the day to finally install my second battery, and multi-battery switch.
Here is what you will need.
Blue Sea Systems 6007 Switch
12ft of 6 gauge red cable
12ft of 6 gauge black cable
2 sets of battery connectors (the ones with the holes)
red/black shrink wrap
2 10" bags of wire loom
Group 27 Battery
Battery tray
Stainless steel wood screws (1/2")
3M 5200 sealant
Wire ties/zip ties
Here we go!
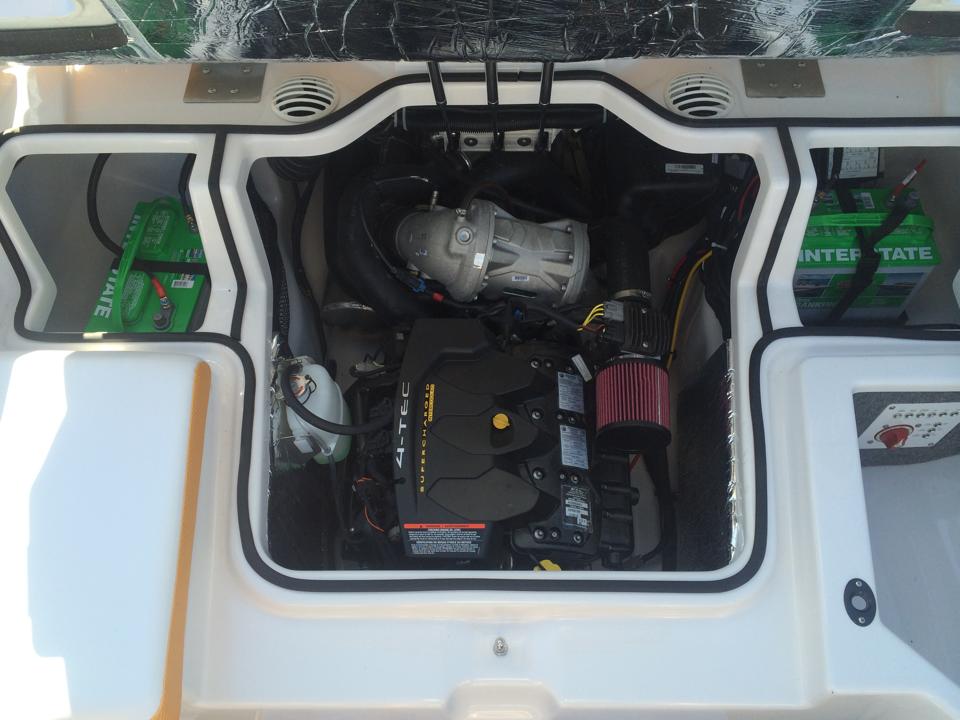
- Open the engine cover, and the port side rear cushion to access the battery switch and breaker panel. Disconnect the positive on the battery.
- Look behind the switch and you will see a black plastic cover screwed into the noise insulator material. Remove the screws (its going to be tight. Take your time and don't loose the screws.)
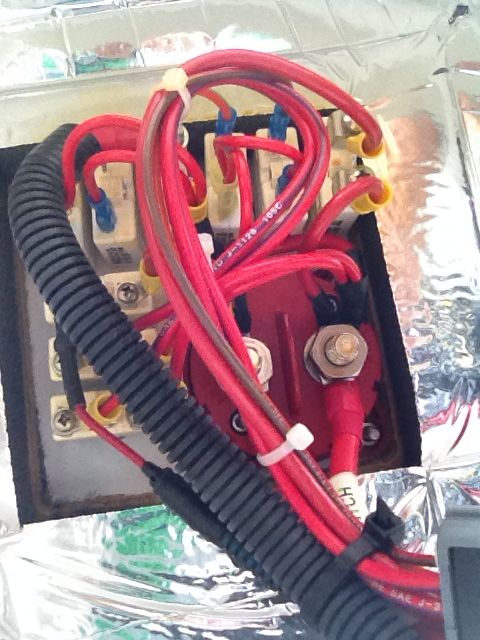
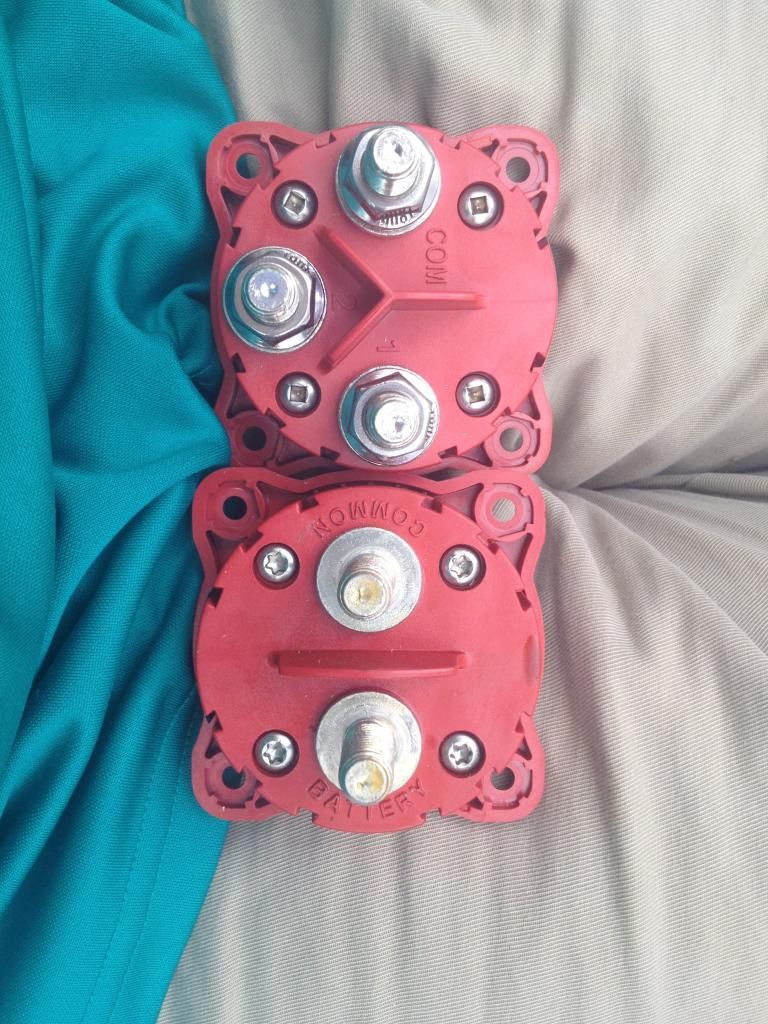
- Now you will have exposed the connections. You will see the back of the switch with two large nuts.
- On the oem switch, the common (switch) wire is on the left, and the battery is on the right. Make sure you keep track of the wires that are attached to each side. DON'T MIX THEM UP!!!
- Remove the cables and wires, and put them aside
- Get your fingers and feel around behind the switch. Find the nuts/bolts and unscrew it (4 bolts/nuts) Be careful not to loose the nuts. And place them in a safe place.
- Remove the switch, and install the new switch.
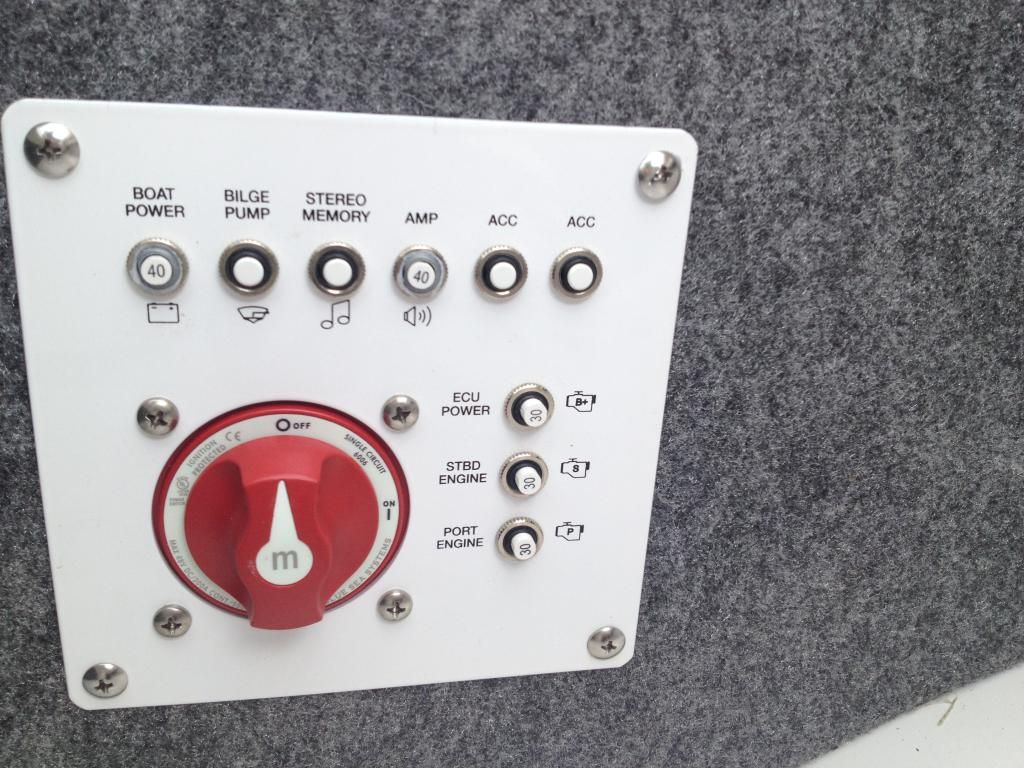
- Once the new switch is installed, the common will now be the port side bolt/connector on the switch. The battery will be the center bolt/connector. Go ahead and connect the wires and cables, and connect them just like they were on the oem switch, and tighten. YOUR OLD/PORT SIDE BATTERY IS NOW #2 ON THE SWITCH!!!
- You have now connected the switch to the boat, and the first battery. The boat will work on that battery's position. And your stereo's memory will not be affected by any position on the switch.
- Time to install battery tray on the starboard side storage next to the engine. Make sure to pre-drill the holes with the drill in reverse, and use painter's tape. This will keep the gel-coat from fraying.
- Squeeze some 3M 5200 in the holes you just made, and screw the battery tray down. HAND TIGHT ONLY!!!! Let the 5200 dry for a couple hours before going to the next step.
- Install the new battery, and strap it down.
- Time to run the new battery cables. Put one end of the connectors, and wire loom on the new battery cables. The side with the new connectors will be your new battery side.
- Fish the new cables behind the ventilation pipe, and the 3 engine bay shocks. Tie wrap onto the existing wiring. Not to many ties, just enough to hold the new cables. You don't want to give yourself a headache if you ever need to isolate a trouble.
- Cut the black cable to length needed to connect the BLACK cable to the negative of the first battery (old one). Make sure the connection is TIGHT.
- Bring the new RED cable to the starboard side bolt/connector on the new switch. Cut the cable to length, and tighten. You now have the second battery connected.
- Test and make sure you can start the engine on all 3 settings (1,2,1+2)
- Enjoy your new 2 battery setup. You dont ever have to worry about getting stranded because of a dead battery
Last edited: