• Welcome to Jetboaters.net!

    We are delighted you have found your way to the best Jet Boaters Forum on the internet! Please consider Signing Up so that you can enjoy all the features and offers on the forum. We have members with boats from all the major manufacturers including Yamaha, Seadoo, Scarab and Chaparral. We don't email you SPAM, and the site is totally non-commercial. So what's to lose? IT IS FREE!

    Membership allows you to ask questions (no matter how mundane), meet up with other jet boaters, see full images (not just thumbnails), browse the member map and qualifies you for members only discounts offered by vendors who run specials for our members only! (It also gets rid of this banner!)

    free hit counter
  • Guest, we are pleased to announce that Hydrophase Ridesteady is offering an extra $100 off for JETBOATERS.NET members on any Ridesteady for Yamaha Speed Control system purchased through March 7th, 2025. Ridesteady is a speed control system (“cruise control”) that uses GPS satellites or engine RPM to keep your boat at the set speed you choose. On twin engine boats, it will also automatically synchronize your engines.

    Click Here for more information>Ride Steady group buy for JetBoaters.net members only

    You can dismiss this Notice by clicking the "X" in the upper right>>>>>

Sport jet 90 - 120 intake grate streamlining?

RedBarron55

Jet Boat Addict
Messages
280
Reaction score
100
Points
122
Location
Navarre, FL
Boat Make
Jetcraft
Year
1995
Boat Model
Other
Boat Length
16
Now that I have mu boat running with the Franken-Grate
full

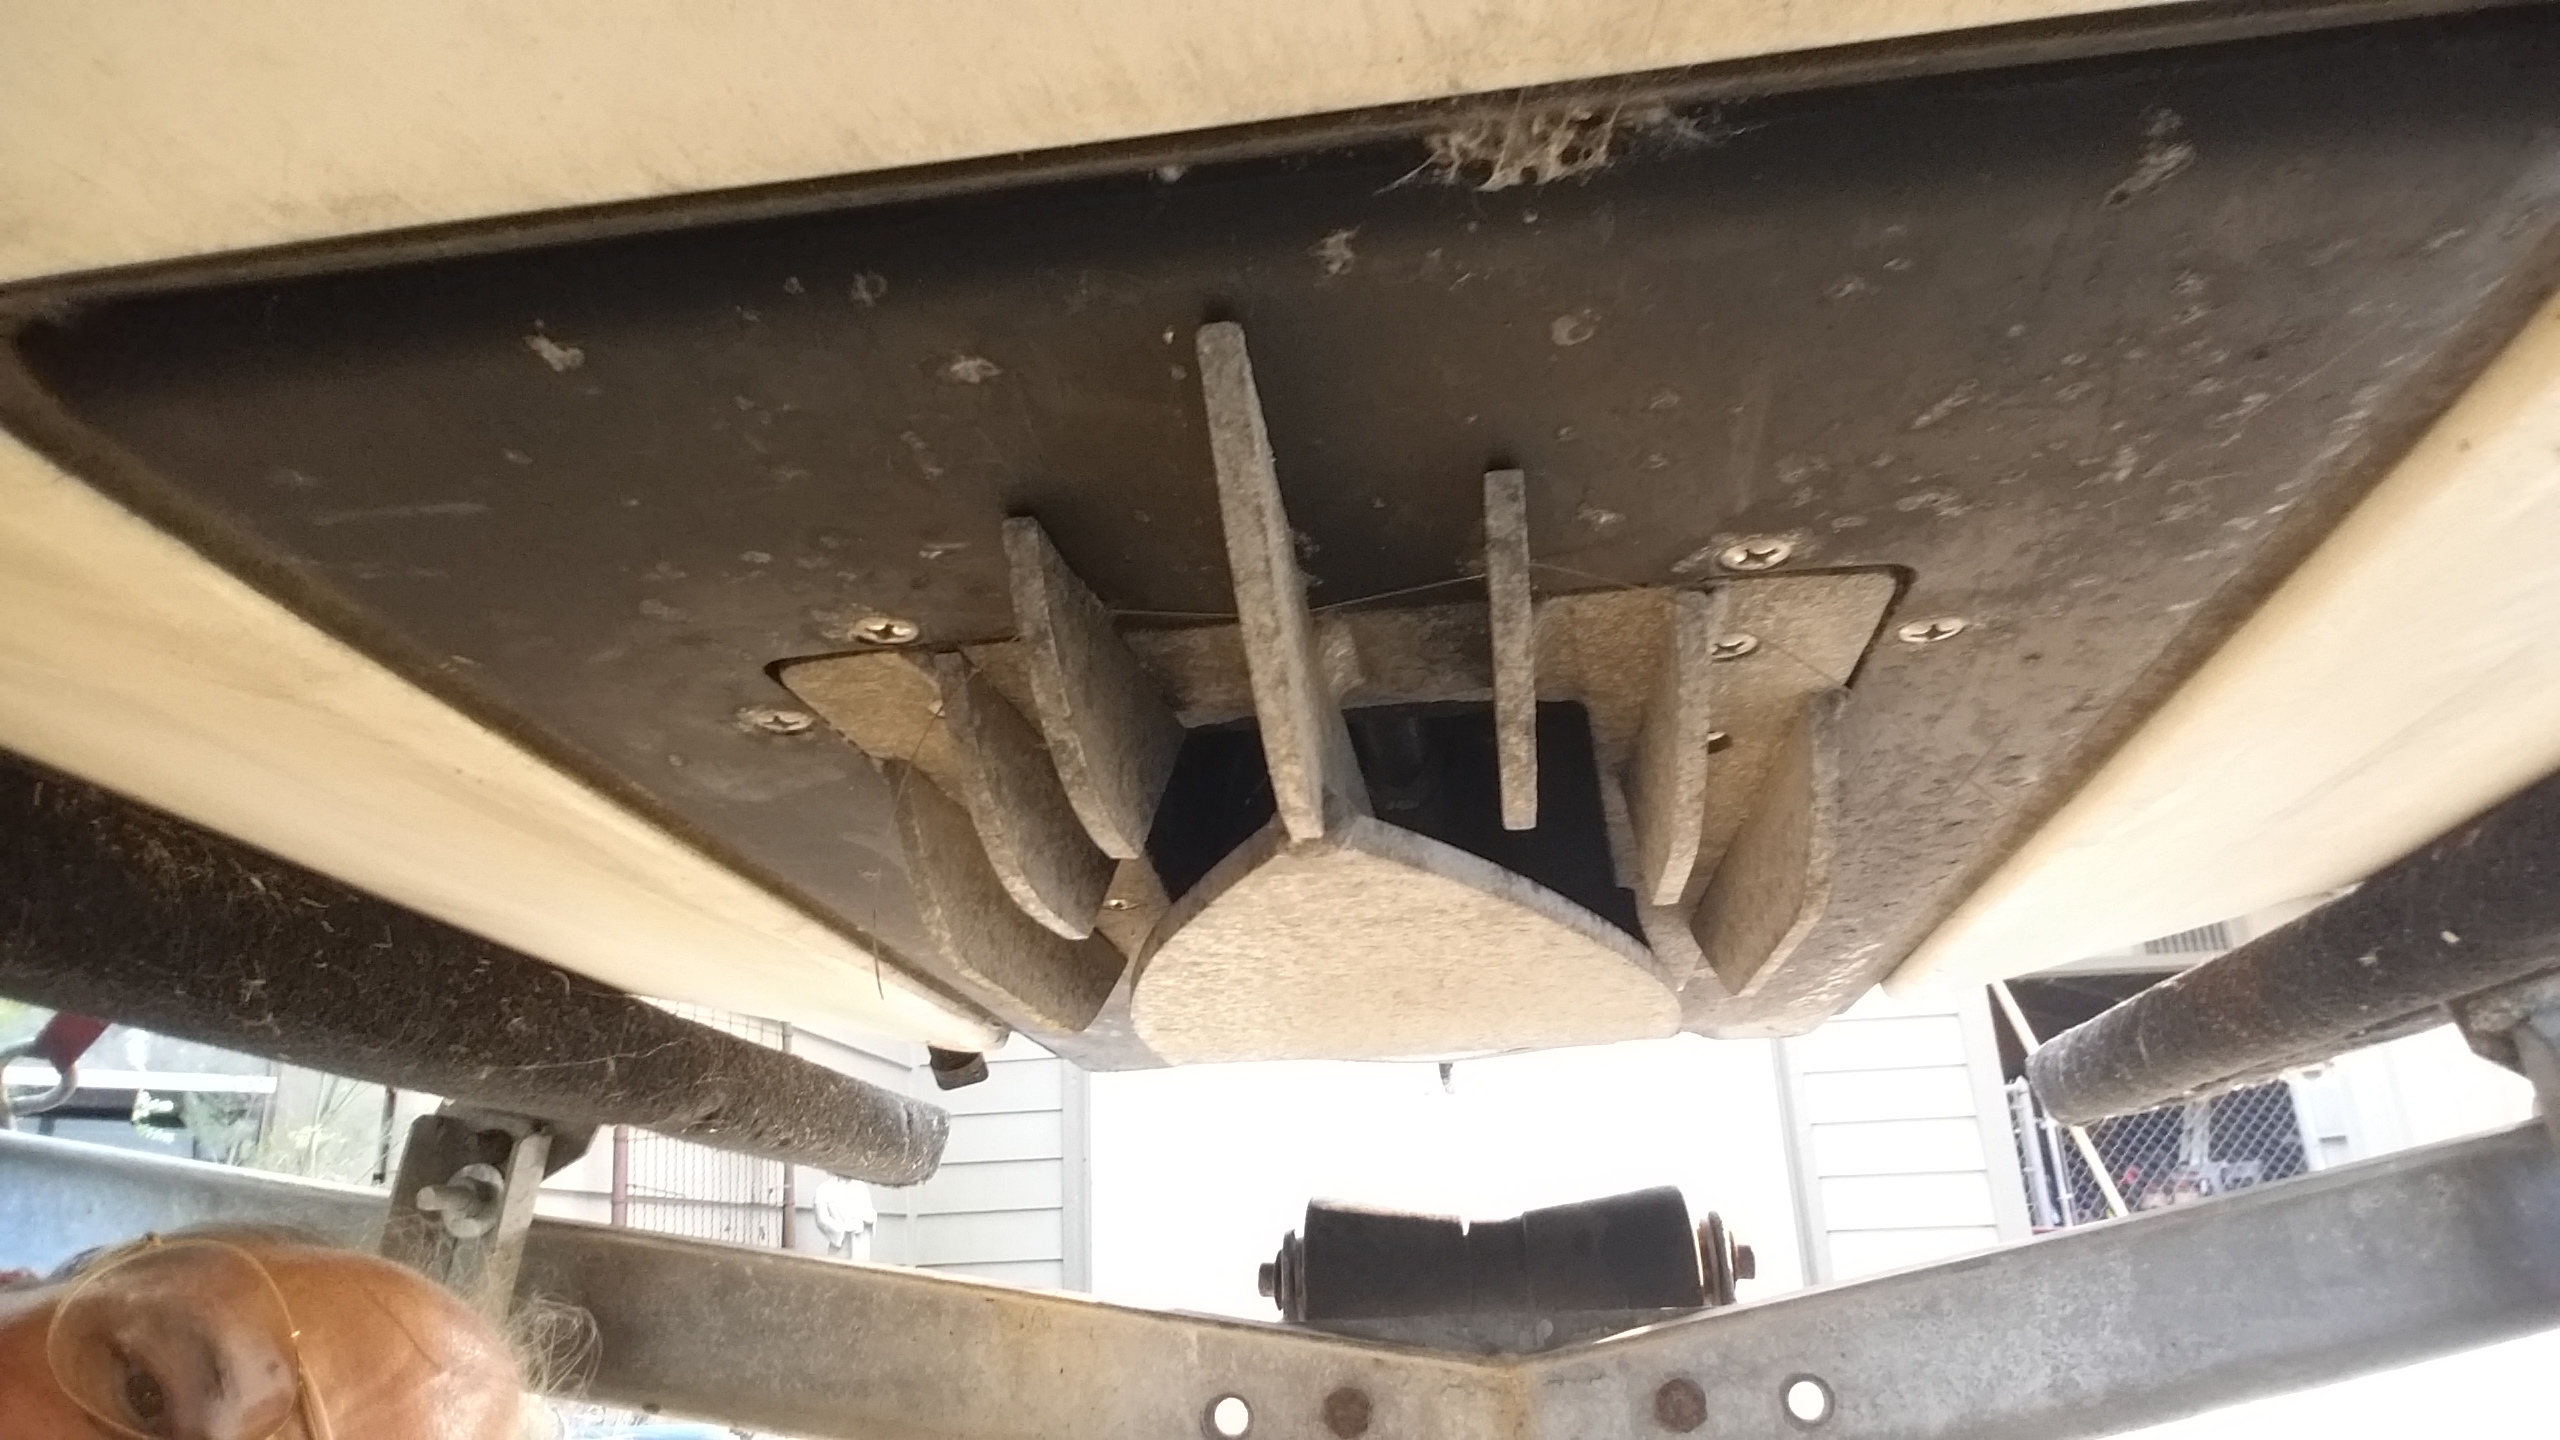
That hangs down into the water stream a pretty good bit.
The boat speed is not as fast as the original tests say it should be .
I got 32 MPH at ~5000 rpm where the 1995-6 tests gave a speed of 38 MPH with the poling platform and two people, 40 without the platform.
I think that the stock grate might be faster (while I don't need a lot more speed in the chop in the Santa Rosa sound)
I have a stock late model grate (1996) I hope will fit or can be modified since the pump housing is the same P/N.
My question is if before I install it is there anything to be gained by smoothing or streamlining the grate bars?
I don't think I will have a problem with stones here in the land of sand.
As an aside I have no idea of the heritage of the grate I have and perhaps it would be worth 6 mph it it were more weedless or sucked up less sand in shallow water.
I think if you ran over a sandbar the dredge effect would pack the pump full of sand, however.
Any experience with streamlining or modifying the 1996 grate of what the fitting to an older jet (1994-5) pump?
As a second thought you can see that there is a slight depression all the way around the ride plate is there any advantage to filling and smoothing with some RTV or other filler?

Pay no attention to the old, bald guy in the lower left of the picture!
 
I always sharpen the leading edges of my intake grates
 
Actually there are several things I do to the intake grates day one because of the weed issue here in Tampa bay, prior to doing these mods I would need to constantly stop or jump waves or do the reverse move to get the weed out. My mods do an excellent job of reducing but not totally eliminating the weed issues. But even when weeds do manage to get on the grate I know they are there but they do not cause me to need to stop. I have a list of items I do from the beginning learned from past decades of boating.
 
Jeff can you post some pictures? Or perhaps tel us what you d and the results.
We don't have a bad weed problem here in Navarre on the sound, but since I haven't gotten FrankenGrate off yet I have time to work on the late model grate I bought.
By the way I feel better about my speed with FrankenGrate since I looked at the phone GPS speed app that recorded the track and max and min speeds.
The thing was set to knots instead of MPH so the speed was 32 Knots or about 36+ MPH.
That is just 2 mph off of the 1996 test and may be more accurate then their test.
When I go the the trouble the unscrew, break the heads off and drill out and tap I may try doing a better job of streamlining the blunt edges left on Frank.
 
Whaddabout the trailing edges?
I would think that making a streamlined profile on both sides would help.
When I get the FrankenGrate off and the holes retapped and repaired I will Smoothing the plates etc to help move water in.
Would a better pickup load the engine more and reduce rpms or feed in higher pressure water and reduce the rpms?
 
get one like this it is for a 90 or 120 hp they are available on e bay I believe
 
I bought one off of eBay for a 1996 the latest one.
I don;t know it there is any difference in that one and the one that came on my boat, but the pump housing part numbers are the same so I assume that I can make it fit.
I was wondering about any useful modifications before I install it after I remove FrankenGrate and fix the mounting holes I know I will have to drill frozen, corroded screws from.
So far I have one removed, one head broken off and one that the Apex Phillips bit broke off in.
WHo knows Frank might be better (or worse), but I have the new stock grate and trying stuff keeps a retired guy busy.
By the way the grate in your post is the older one I think and the newer one has a little different shape in the inside front. the "upper roof" goes further back, perhaps for better flow?
I can't think why Mercury would design and incorporate a worse working part so who knows?
 
7CD01AF5-54A6-45D1-B764-536C4C01E7A5.jpeg 80B40FC7-B031-4DF5-8E40-13F2F870FE82.png Hi, I was wondering if anyone knows if you remove the impeller grate and/or ride plate on 1996 Regal Rush XP 120 jet boat will you be able to see the thru hull connector that the gate control/shift cable goes through? Mine broke a few days ago and I’m in the process of loosening the Phillips screws (6). 2 are really stuck even with my impact screw driver and PB spray.
Any help is greatly appreciated!
Regards,
Ski
 
Haven't been there yet, sorry.
I had the ride plate and grate off, but I didn't look at where the cables come through.
The installation manual should show a bit about it though.
 
Thanks for your reply RedBarron! This morning I will look closely at the side foam exhaust seal. When I took a close photo of the OE serial number and hole where the cable enters I noticed there may be enough room for a new fitting if I pull out the seal at the top. If so, I will take a 1/4” plastic rod and insert until it reaches the thru hull hole. I’ll then slide a new fitting on the rod with a string attached to it. I’ll insert the rod again, pull the string through the hole and gently pull the fitting through the hole.
I’ll take some photos and update afterward!
 
Back
Top