• Welcome to Jetboaters.net!

    We are delighted you have found your way to the best Jet Boaters Forum on the internet! Please consider Signing Up so that you can enjoy all the features and offers on the forum. We have members with boats from all the major manufacturers including Yamaha, Seadoo, Scarab and Chaparral. We don't email you SPAM, and the site is totally non-commercial. So what's to lose? IT IS FREE!

    Membership allows you to ask questions (no matter how mundane), meet up with other jet boaters, see full images (not just thumbnails), browse the member map and qualifies you for members only discounts offered by vendors who run specials for our members only! (It also gets rid of this banner!)

    free hit counter
  • Guest, we are pleased to announce that Hydrophase Ridesteady is offering an extra $100 off for JETBOATERS.NET members on any Ridesteady for Yamaha Speed Control system purchased through March 7th, 2025. Ridesteady is a speed control system (“cruise control”) that uses GPS satellites or engine RPM to keep your boat at the set speed you choose. On twin engine boats, it will also automatically synchronize your engines.

    Click Here for more information>Ride Steady group buy for JetBoaters.net members only

    You can dismiss this Notice by clicking the "X" in the upper right>>>>>

Winter mods started

RadioWaves

Jet Boat Junkie
Messages
144
Reaction score
94
Points
147
Location
Benton missouri
Boat Make
Chaparral
Year
2013
Boat Model
Other
Boat Length
25
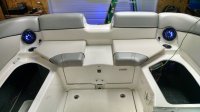
I started a few mods to the new to me boat, new stereo head and remote unit, amplifier, cabin speakers , tower speakers.

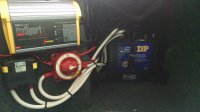
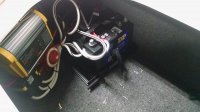
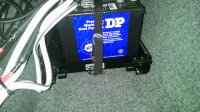
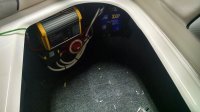
Also added a house battery with switch and charge controller, 2 bank charger and the best mod yet, a sliding tray to get the batteries out of the way, it freed up a lot of space under the seat. Still need to find a way to arrange the wiring neater.

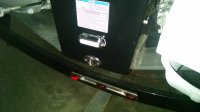
Added Jeremy0011's tow point light and also added an underwater led.

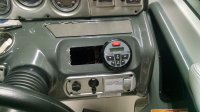
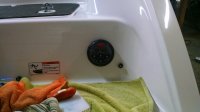
Still need to add the Thrust Vectors and I am going to make a panel to cover the opening to the left of the helm stereo head unit and add a depth gauge and switches for the led's. Also need to modify the bimini material to work with the speakers.
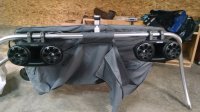
IMG_20161225_134607778.jpg IMG_20161225_134621516.jpg IMG_20161225_134732067.jpg IMG_20161225_134658154_HDR.jpg IMG_20161225_134759299.jpg IMG_20161225_134813871.jpg IMG_20161225_134713804_HDR.jpg IMG_20161225_134846654_HDR.jpg IMG_20161225_134951972.jpg IMG_20161225_134935482.jpg
 
Very nice. Congrats.
 
I started a few mods to the new to me boat, new stereo head and remote unit, amplifier, cabin speakers , tower speakers.

Also added a house battery with switch and charge controller, 2 bank charger and the best mod yet, a sliding tray to get the batteries out of the way, it freed up a lot of space under the seat. Still need to find a way to arrange the wiring neater.

Added Jeremy0011's tow point light and also added an underwater led.

Still need to add the Thrust Vectors and I am going to make a panel to cover the opening to the left of the helm stereo head unit and add a depth gauge and switches for the led's. Also need to modify the bimini material to work with the speakers.
View attachment 49411 View attachment 49412 View attachment 49413 View attachment 49414 View attachment 49415 View attachment 49416 View attachment 49417 View attachment 49418 View attachment 49419 View attachment 49420

Where did you get the sliding tray? That is a great idea!
 
I was able to run to Home Depot and make a battery sliding tray today. I think it worked pretty well, so thanks for the idea. I now actually have usable port side storage and it also keeps the batteries away from kids and unsuspecting passengers fingers. My one question, does anyone know what size gauge the factory battery cables are? I need to buy a couple so that the sliding tray can go all the way back and it's too dark now to head back out onto the boat before I buy something online tonight.
 
I used #4 wire, should be the same as original cables
 
Don't quote me but I believe those OEM wires are 4 gauge
 
I think their 6g, but I'd use 4 minimum, probably 2g but i overdo 12v wiring because of the voltage drop. I bought a hydraulic crimper that works awesome! I redid my rv in 0g for the main runs and 2 or 4 depending on the draw.
 
I don't know why I said 4 last night. I was thinking more in the 8 gauge. But like Jgorm said it might be 6 but haven't seen 6 gauge much anywhere. Usually 4 or 8.
 
I don't know why I said 4 last night. I was thinking more in the 8 gauge. But like Jgorm said it might be 6 but haven't seen 6 gauge much anywhere. Usually 4 or 8.
Oh well, I went ahead and ordered 4 gauge last night off of Amazon. But either way, bigger should be a little better :)
 
I was able to run to Home Depot and make a battery sliding tray today. I think it worked pretty well, so thanks for the idea. I now actually have usable port side storage and it also keeps the batteries away from kids and unsuspecting passengers fingers. My one question, does anyone know what size gauge the factory battery cables are? I need to buy a couple so that the sliding tray can go all the way back and it's too dark now to head back out onto the boat before I buy something online tonight.
You can't tell us you made something cool and no post pictures. So let's see it already!
 
It was getting dark so my pictures didn't turn out great and of course I always forget to take pictures during the process.

The first shot is with the slider fully extended the second is looking back into the storage nook with the tray tucked away. It can still probably go back another 6-10" but I needed to order a couple longer battery cables to fully extend the travel. This was probably one of the easiest mods I have done. I just got a pvc board and some 24" heavy duty drawer sliders, cut the board to width, screwed in the sliders then, screwed in the battery trays and finally the charger, rewired everything and good to go. I also used some spray adhesive and attached one of those furniture sliding disks to the bottom front to alleviate any weight when the tray is extended. This should also prevent the sliders from snagging on the carpet. I still need to clean up the wires some but now I have the whole compartment to use and the batteries end up completely out of the way.

Once I get an amp, I am thinking about attaching a hinged board to the hull side of the existing pvc board. that would hold the amp and slide in and out with the batteries. It would just rest against the carpeted wall of the compartment.
 
Last edited:
It was getting dark so my pictures didn't turn out great and of course I always forget to take pictures during the process.

The first shot is with the slider fully extended the second is looking back into the storage nook with the tray tucked away. It can still probably go back another 6-10" but I needed to order a couple longer battery cables to fully extend the travel. This was probably one of the easiest mods I have done. I just got a pvc board and some 24" heavy duty drawer sliders, cut the board to width, screwed in the sliders then, screwed in the battery trays and finally the charger, rewired everything and good to go. I also used some spray adhesive and attached one of those furniture sliding disks to the bottom front to alleviate any weight when the tray is extended. This should also prevent the sliders from snagging on the carpet. I still need to clean up the wires some but now I have the whole compartment to use and the batteries end up completely out of the way.

Once I get an amp, I am thinking about attaching a hinged board to the hull side of the existing pvc board. that would hold the amp and slide in and out with the batteries. It would just rest against the carpeted wall of the compartment.

GetAttachmentThumbnail
I cannot view the pics. Seems like the links are broken.
 
Nice work. If you want to free up a little more room in that compartment you may be able to mount the onboard charger/maintainer next to the battery switches . Also, now is a good time to add a positive and negative lead up to distribution blocks under the helm for potential future upgrades. I may add a furniture slider to the front of my tray like you did, thanks for the idea.
 
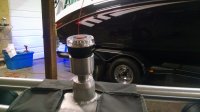
Got the dash plate finished and added the quick disconnect for tower wiring, connected tower speakers (beside the boat) and figured out pretty quickly that I need a sub. If I get the bass good in the cabin the tower speakers have too much. My amp has a sub out with a remote mounted pot for level. With that setup I should be able to adjust bass on tower separate from the bass in the cabin.
IMG_20161230_141939015_HDR.jpg IMG_20170102_130036008_HDR.jpg IMG_20170102_130120977_HDR.jpg
 
What kind of connector is that? That's exactly what I need. I like the sheathing around the wires.
 
That's what I thought it was. I'm not familiar with those connectors, though. I haven't seen one up close to see how the wiring gets installed. Any idea if they make 7 or 8 conductor cable with sheathing that will work with those connectors? I need at least 7 wires in my install, possibly 8.
 
Back
Top