• Welcome to Jetboaters.net!

    We are delighted you have found your way to the best Jet Boaters Forum on the internet! Please consider Signing Up so that you can enjoy all the features and offers on the forum. We have members with boats from all the major manufacturers including Yamaha, Seadoo, Scarab and Chaparral. We don't email you SPAM, and the site is totally non-commercial. So what's to lose? IT IS FREE!

    Membership allows you to ask questions (no matter how mundane), meet up with other jet boaters, see full images (not just thumbnails), browse the member map and qualifies you for members only discounts offered by vendors who run specials for our members only! (It also gets rid of this banner!)

    free hit counter
  • Guest, we are pleased to announce that Hydrophase Ridesteady is offering an extra $100 off for JETBOATERS.NET members on any Ridesteady for Yamaha Speed Control system purchased through March 7th, 2025. Ridesteady is a speed control system (“cruise control”) that uses GPS satellites or engine RPM to keep your boat at the set speed you choose. On twin engine boats, it will also automatically synchronize your engines.

    Click Here for more information>Ride Steady group buy for JetBoaters.net members only

    You can dismiss this Notice by clicking the "X" in the upper right>>>>>

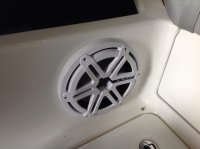
Amp and sub install on AR240

image.jpg

Ta da!

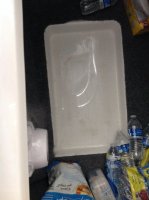
And the top view:
image.jpg

Not bad on the impact on the storage area at all. Quite pleased.

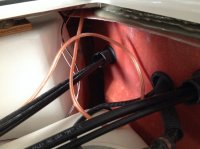
The wire path:
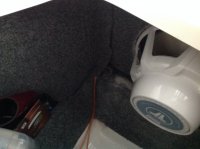
image.jpg
image.jpg

Coming into the fuel tank compartment... From there it follows the same route to the helm. I tied up everything in the fuel compartment pretty with zip ties. Then, in the helm compartment...
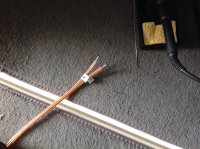
image.jpg

Tinned and labeled the sub wires.

End of day's report!
 
Looks great! I am following along closely. I just finished my enclosure today and will probably do a final test fit tomorrow. Ran my 1/0 gauge power and ground yesterday from the battery to the helm. Went over the fuel tank and then hung under the ledge in the locker. I was able to fish the wire from there to the helm with minimal effort. Making progress, but a long way to go.
 
dont forget to remove the bag of pretzels, those are my favorite brand BTW:winkingthumbsup"
 
Excellent @redthumper9 ! Can't wait for your pics! Let me know if I can help (blind leading blind, but...).

@rickd01 , you will have to fight the wife for them. Good luck.
 
My enclosure. It will go in the port side storage under the recliner. I test fitted it a couple of months ago without the speakers actually in it. There is plenty of room once its in place, but the grills protrude an inch or so.....that may be a challenge actually clearing the initial opening under the seat. We will see tomorrow! Now to just figure out my best venting options.20140316_222044.jpg
 
Not to hijack your thread, but this is my amp rack. Yes, I know they are not class D. I didn't have the budget for those yet. Not to mention I already had one of the amps and it performed very well. Maybe next year, Ill make the jump to the Rockford Marine or JL Audio amps.20140316_181913.jpg
 
Wow! Very nice. On both of them. Oh, and it is no hijack at all in my book. Great to see how someone else does these, and every little bit helps.

So, the amps are on a separate board? You mount that in the helm compartment?

Bet the subs will thump you a bit... Do you have that indentation I showed above, under the port side seat?
 
Yes....I will bolt that board to the back of the starboard bow seat in the helm compartment. I do have that indentation under the seat. If everything does not work out like I want, I may just go the route you did with the two subs (did you say you saw more aluminum in the way further forward in that compartment?), pick up an AO cooler and be done with it. I'd only be out the materials on the enclosure and a couple of hours.
 
The aluminum plate seems to be squarish and covers the whole area at the base of the indentation. You can see from the pics where I drilled into it. When I looked on the aft side of the underneath of the indentation with a bright light, I could see the plate at the aft side there going all the way port to starboard.

So if the plan is to do anything with that indentation, make another plan. :)

But hopefully you are either under it or can just set the box up against it.
 
@tdonoughue Thanks for the pics. Looks great and I bet it sounds awesome. I don't use that space for my ice chest so i have no concerns about clearance on the backside.
 
Next step is to do the wiring to the amp and set its levels, so right now it sounds about the same...

But it sure looks nice, doesn't it? :)
 
Did you put a speaker ring on the inside of the sub for support ??? If not how did you fasten it so it does not come loose?
 
I did not. The screws with my sub and the instructions all seemed to indicate that mounting directly on the fiberglass was ok. The speaker has a rubber gasket there, too. I checked the fiberglass thickness (way thicker than minimum) drilled the pilot holes to the spec in the instructions and screwed that puppy on.

Time and the community here will tell if I have erred...
 
Avoid time doing that to you Tim. Get a speaker ring behind it. A 3/4" birch ring gives good bite for long term by the fasteners of the speaker to the birch itself...not the wall. The vibrations of a subwoofer will pull the screws out of the holes or at a minimum will cause them to get loose. The actual wall of the boat should literally be sandwiched between the subwoofer and the speaker ring. And the speaker ring adds rigid support for that huge hole you just cut in the wall. Think of it as a header over a window or doorway where that big opening doesn't support the roof without it. You want a speaker ring on there.
 
See? Told you they would tell me... :)

Guess I will be adding a speaker ring shortly...
 
Mel is right.....make sure to get a speaker ring back there. You've been meticulous on the install so far....don't skimp there

On a side note, my enclosure did fit! As expected I had to remove the grills and reinstall them after clearing the initial opening, but all in all, a perfect fit. The box does not protrude into the initial opening just as planned. This is a pic looking down. Now just have to vent it. Disregard the loose wires. I have not made all of my connections yet.
 

Attachments

  • 20140317_090407.jpg
    20140317_090407.jpg
    179.6 KB · Views: 48
You don't have to paint it with epoxy or even white paint on top of that, like I did, but you will be glad you took the time to cut out a birch ring and screw the speaker to it, through the holes, not binding in the holes. So you will have to winden the holes that the mounting screws go through, and you will have to go the the nuts and bolt store and get screws that are 3/4" longer...but it will be worth it. And me...if I was doing it, I would paint it with epoxy to protect it long term, but the likelihood of it getting too wet isn't big. Heck, just a coat or two of paint on primer is good enough!
 
Are you going to "port" that outside the seat compartment @redthumper9 ?
 
Anyone know where I can get a birch speaker ring ? Does anyone make them ? I will need TWO asap!!
 
Back
Top